
Introduction
This document will provide guidelines on how to create an Export to Excel button in PowerApps.
Also, note that:
- I’m using a Swedish version of PowerApps where delimiters are “;”, in most other versions you would use a comma instead “,”. Check if you need to change it for it to work in your version.
- Always be aware of where you are saving files so that only people who should have access to the data can access the files.
- Sometimes when you copy code into PowerApps and PowerAutomate you need to make sure that the apostrophes are the correct format for it to work. You might have to remove them and add them directly in the app or flow.
PowerApps – Part 1
Add a button
Add a button to your canvas, we will write all the code in the OnSelect – part of the button.
Create a collection
To export our table from PowerApps, we will create a collection which the Power Automate flow then can access. The table that I’m exporting is currently a Gallery within PowerApps, if your data is coming from a Table instead you might have to make modifications.
For simple galleries that you want to export, where you have no choice columns and no columns that contain multiple values, for example, a user column that contains name, position, email, and department, you can use the following code to create the collection you want to export:
ClearCollect(ExportDataCollection; Gallery.AllItems)The clear part makes sure you first clear out any previously made collections. To double-check if the collection is correct, go to file -> collections and see that your collection looks the way you want.
For more complex data, where you have choice columns and columns containing multiple values, you can use the following code to get only the values you’re looking for. If you don’t do this, your collection will contain lists and arrays in some columns.
The code below first clears the collection as previously explained, and then creates a collection from the gallery with the specified columns and values. See comments in italics for an explanation.
Clear(ExportDataCollection);;We start with clearing the collection
ForAll( Gallery.AllItems As colCSV;The ForAll function evaluates a formula for all the records in the gallery.
The colCSV is just what we’re naming the Gallery.AllItems to keep as a reference, this is then what we use the table in the rest of the code below.
Collect(ExportDataCollection;
 {'Risk Title': colCSV.'Risk Title';
The first Risk Title is what we’re naming the column in our collection, this can be changed to any text value of choice.
The colCSV is just a reference to our gallery.
The second ‘Risk Title’ is the column value we’re want to save to this column. This is a text value in our data source and therefore we don’t need to specify anything else.
'Risk Owner Email': colCSV.'Risk Owner'.Email;This is an example of a column that has a value that is an array. The risk owner column contains an array of information, and by adding a .Email to the end, we can specify that we want the email address of the person.
'Risk Owner Department': colCSV.'Risk Owner'.Department;We’re using information from the same column as before, but here we’re choosing to save the value of the department to display what department the risk owner belongs to.
'Risk Status': colCSV.'Risk Status'.Value;This is an example of a choice column, we add the .Value in the end to get the value.
 'Risk Due Date': colCSV.'Risk Due Date';
 'Project Name': colCSV.'Project Name'.Value;
 Created: colCSV.Created;
 'Created By': colCSV.'Created By'.Email;
 Modified: colCSV.Modified;
 'Modified By': colCSV.'Modified By'.Email}))
This looks quite complex, but you can use the same technique here to get the right values as you are already doing in your gallery to display the right values. Remember that PowerApps gives you suggestions that make it even easier, this is for example how it looks when I start writing ‘Created By’: colCSV.’Created By’. :

This makes it easier to get the right values. Remember to try this and go to file -> collections to see that the collection looks the way you want.
Format as JSON
In order to set up our connection with PowerAutomate, we need to parse our collection as a JSON to the Power Automate flow. We will make it JSON with the following line of code:
Set(varFormattedJSON; JSON(ExportDataCollection; IndentFour));;Code v1
Your button OnSelect should now look something like this:
Clear(ExportDataCollection);;ForAll( Gallery.AllItems As colCSV;
Collect(ExportDataCollection;
{'Risk Title': colCSV.'Risk Title';
'Risk Owner Email': colCSV.'Risk Owner'.Email;
'Risk Owner Department': colCSV.'Risk Owner'.Department;
'Risk Status': colCSV.'Risk Status'.Value;
'Risk Due Date': colCSV.'Risk Due Date';
'Project Name': colCSV.'Project Name'.Value;
Created: colCSV.Created;
'Created By': colCSV.'Created By'.Email;
Modified: colCSV.Modified;
'Modified By': colCSV.'Modified By'.Email}));;Set(varFormattedJSON; JSON(ExportDataCollection; IndentFour));;PowerAutomate – Part 1
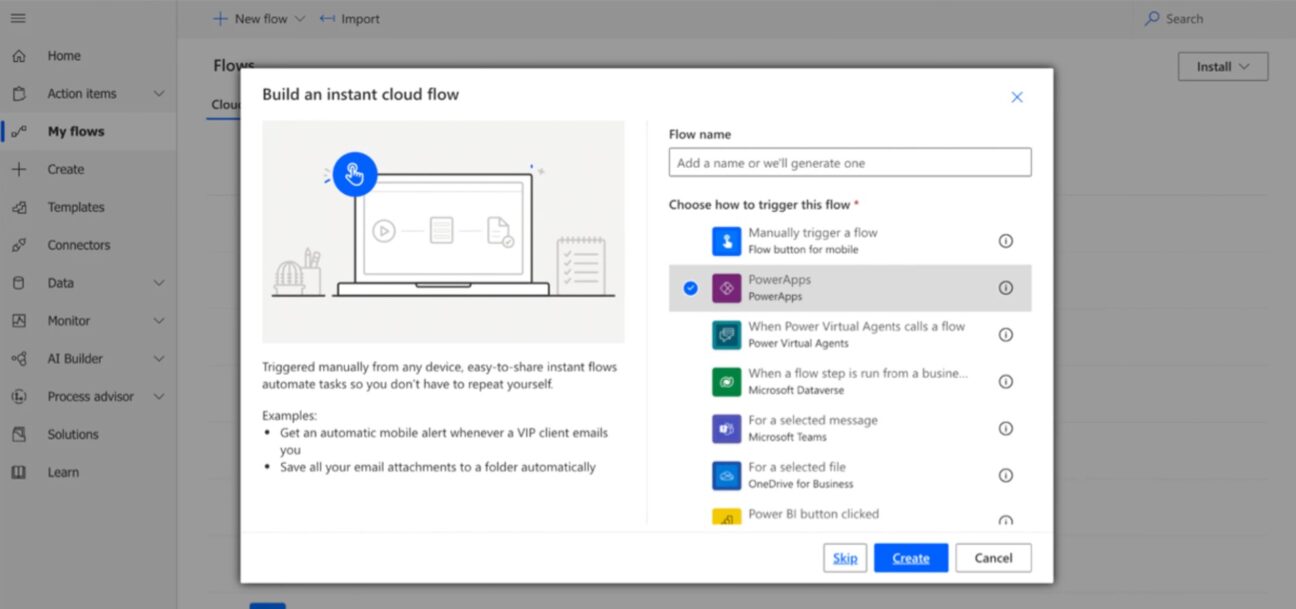
Head over to PowerAutomate and click New flow – > Instant cloud flow -> PowerApps. Name your flow Export to Excel.
PowerApps will automatically be the input for the flow.
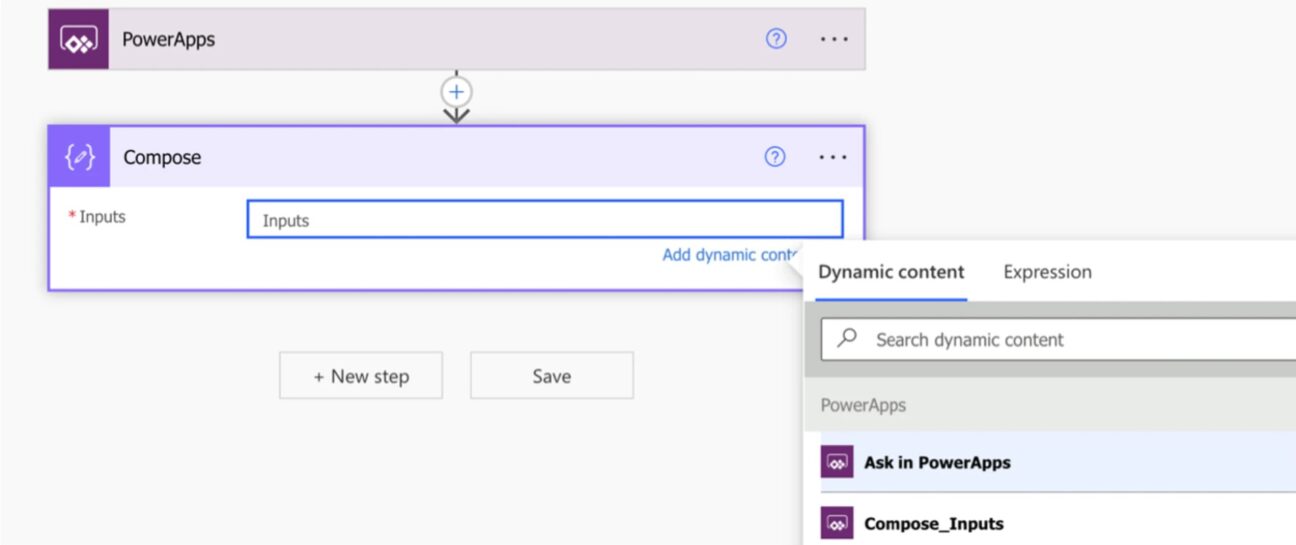
We start with adding a Compose action and we select “Ask in PowerApps”, when you have clicked Ask in PowerApps the Compose_Inputs will pop up as an option.
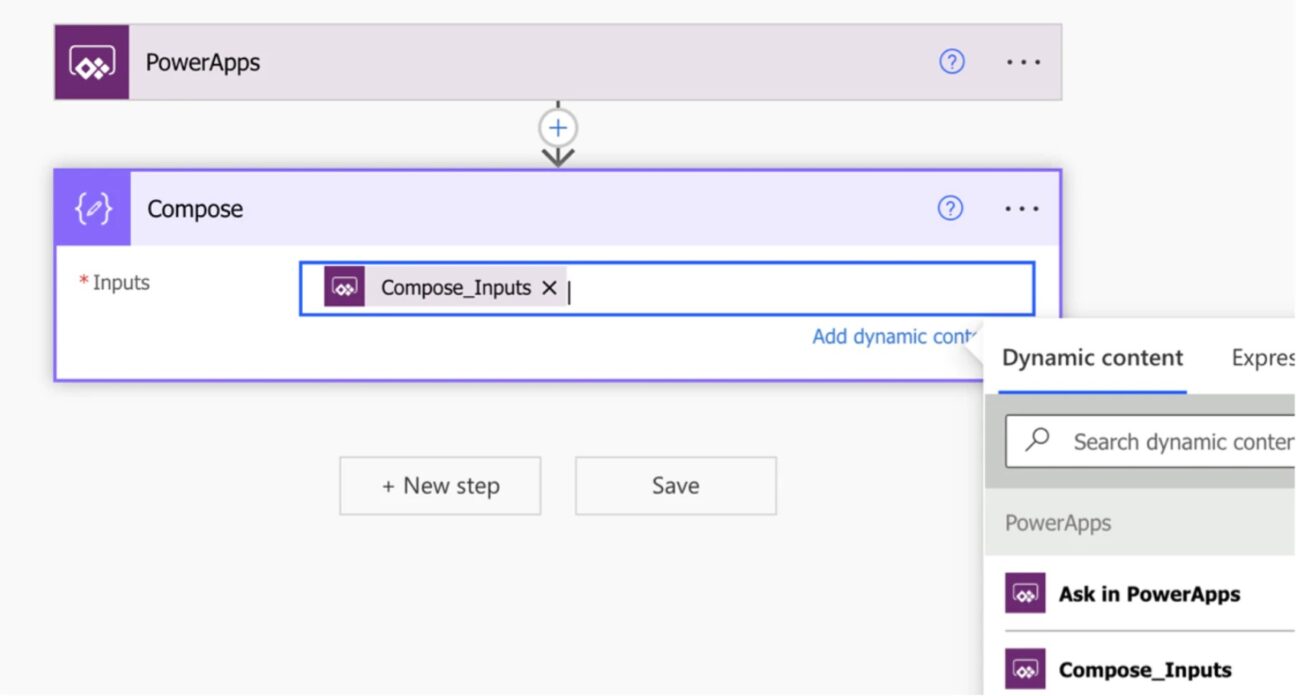
Select Compose_Inputs.
The connection between our flow and our app
Now a very important step comes in, we need to set up the connection between our app and our flow. Save the flow and then head back to our PowerApps.
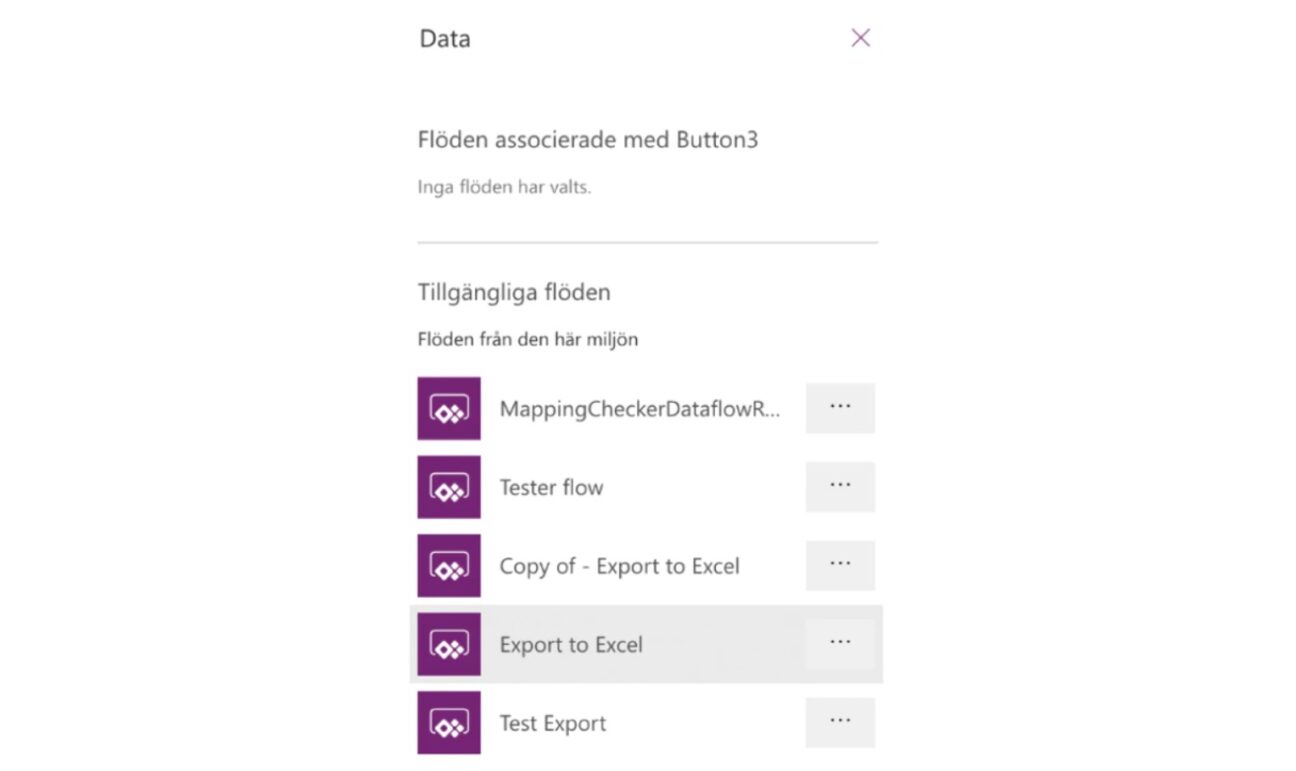
Create a new button and click Action -> Power Automate -> Export to Excel. Your Power Automate workflow will now be added to your PowerApp.
In this new button, add the code from your previous button with this piece of code below it:
ExporttoExcel.Run(varFormattedJSON)Code v2
The full code in this new button should look like this:
Clear(ExportDataCollection);;ForAll( Gallery.AllItems As colCSV;
Collect(ExportDataCollection;
{'Risk Title': colCSV.'Risk Title';
'Risk Owner Email': colCSV.'Risk Owner'.Email;
'Risk Owner Department': colCSV.'Risk Owner'.Department;
'Risk Status': colCSV.'Risk Status'.Value;
'Risk Due Date': colCSV.'Risk Due Date';
'Project Name': colCSV.'Project Name'.Value;
Created: colCSV.Created;
'Created By': colCSV.'Created By'.Email;
Modified: colCSV.Modified;
'Modified By': colCSV.'Modified By'.Email}));;Set(varFormattedJSON; JSON(ExportDataCollection; IndentFour));;ExporttoExcel.Run(varFormattedJSON)You can now click the button and the action will send our collection formatted as JSON to PowerAutomate, we need to do this now so that we can continue working on the PowerAutomate flow with some real data.
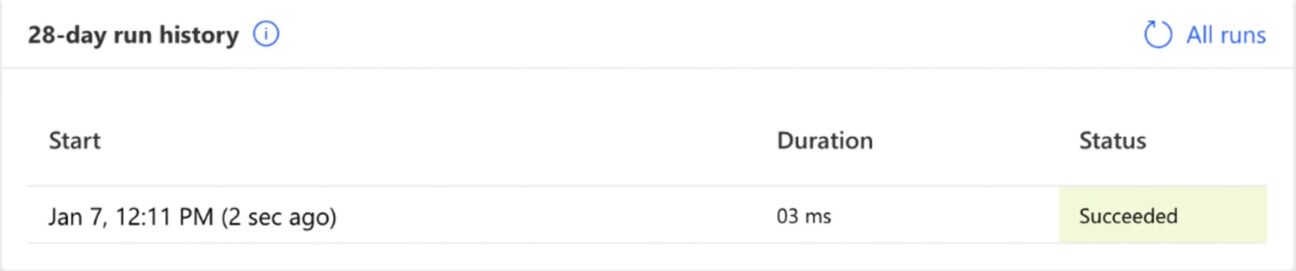
If you go to your flow, you should see this in your run history.
PowerAutomate – Part 2
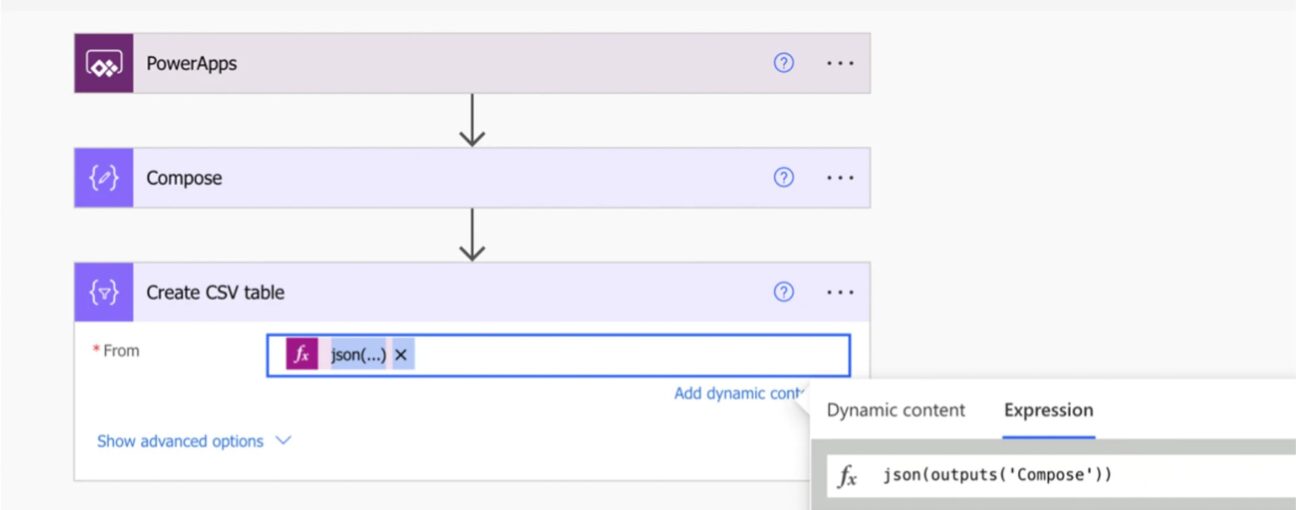
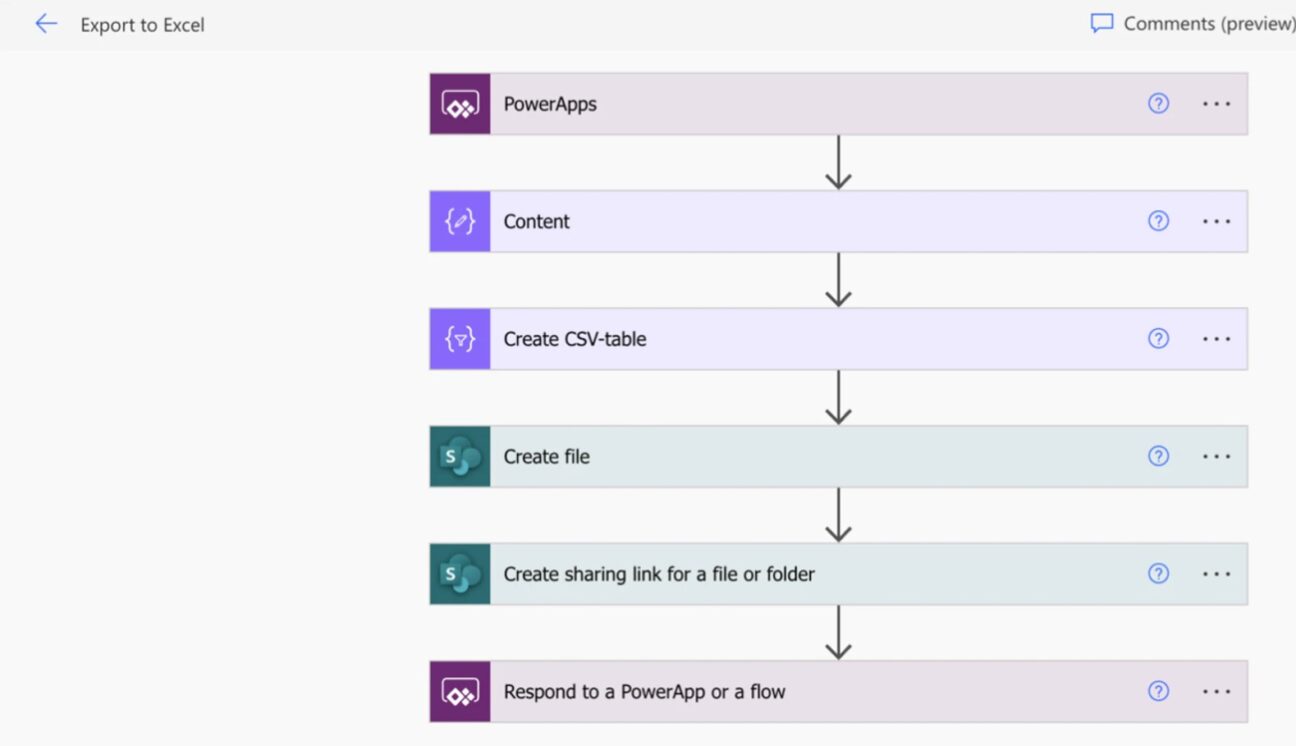
Go back to editing your flow and add the action Create CSV Table. In the From you’ll add the expression json(outputs(‘Compose’)). This action will now make a CSV from the output of the compose action. You can test your flow to see that it works.
In our app, we want the user to get a link when clicking the button. In order to do this, we need to first save the file in a SharePoint location and then create a link that we will send through to the user.
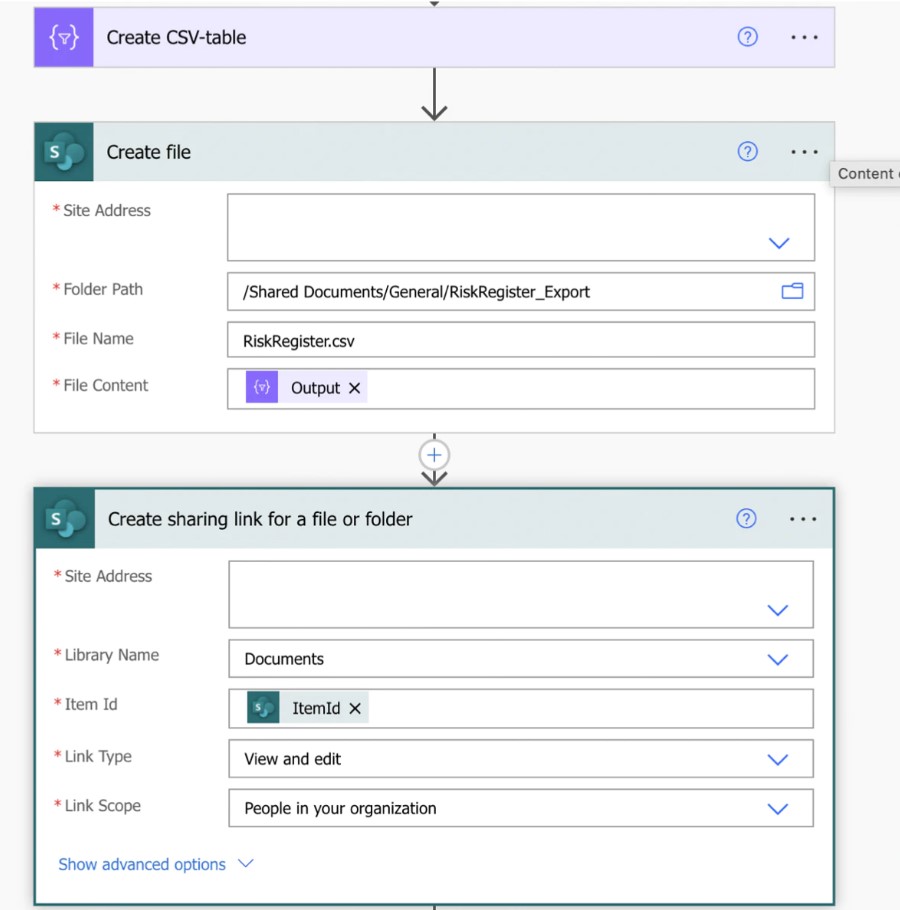
We will use the Create File and Create sharing link actions in PowerAutomate.
In the Create File part, select the site and path you want to save the file to. It’s important that this location is one where only those who should be able to see the data have access. Name the file and select the Output from the Create CSV table as File Content.
In the Create Sharing Link, select the same Site Address as above and the correct Library Name. Your Item Id will come from the Create File action. In the Link Type you can decide if people who open it should be able to edit or only view the file.
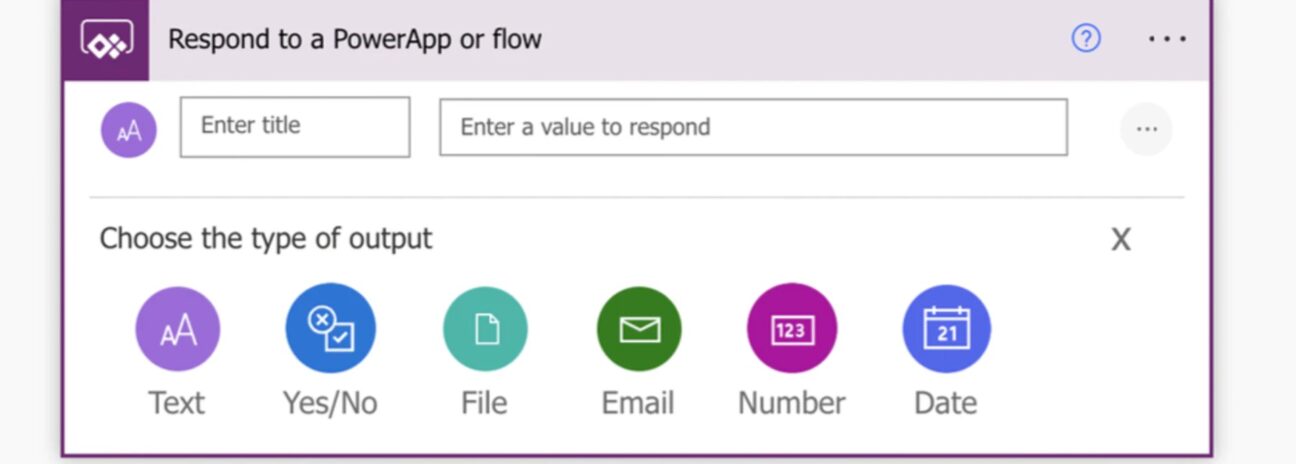
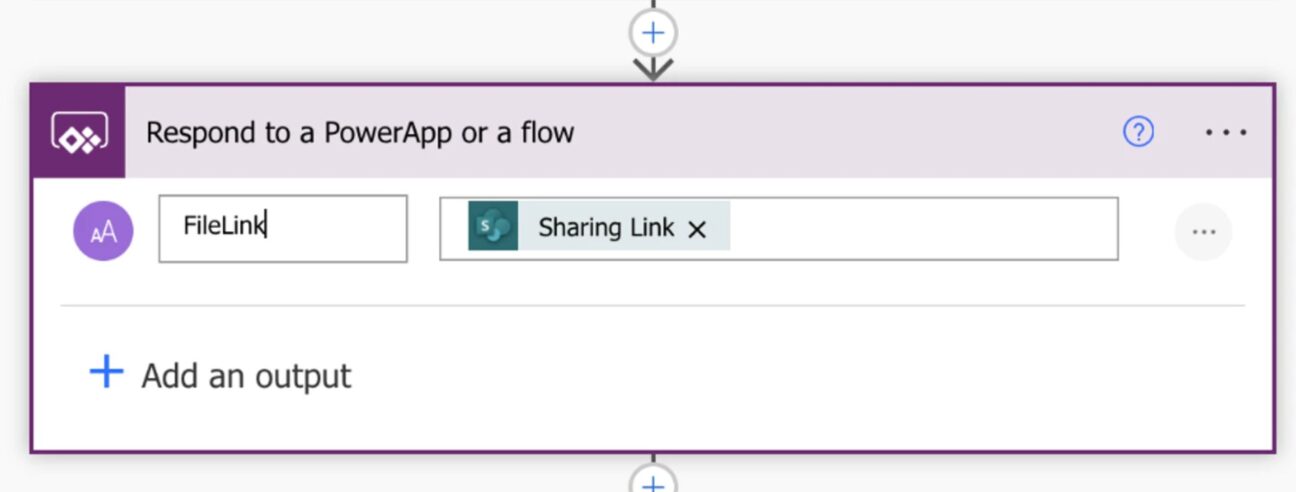
The final action will be to send a response to the PowerApp. Choose the type of output “Text”, here you write a name for the link, I have named mine FileLink, and the value will be the Sharing Link created previously. Our PowerAutomate flow is now done. And the full flow should look like this. Remember to save the app before you return to your PowerApps.
PowerApps – Part 2
When the flow is done, we can return to the previously made button that contains this code (code v2):
Clear(ExportDataCollection);;ForAll( Gallery.AllItems As colCSV;
Collect(ExportDataCollection;
{'Risk Title': colCSV.'Risk Title';
'Risk Owner Email': colCSV.'Risk Owner'.Email;
'Risk Owner Department': colCSV.'Risk Owner'.Department;
'Risk Status': colCSV.'Risk Status'.Value;
'Risk Due Date': colCSV.'Risk Due Date';
'Project Name': colCSV.'Project Name'.Value;
Created: colCSV.Created;
'Created By': colCSV.'Created By'.Email;
Modified: colCSV.Modified;
'Modified By': colCSV.'Modified By'.Email}));;Set(varFormattedJSON; JSON(ExportDataCollection; IndentFour));;ExporttoExcel.Run(varFormattedJSON)We can replace the last bit of code with this one:
Set(varFileLink;ExporttoExcel.Run(JSON(ExportDataCollection;JSONFormat.
IncludeBinaryData)).filelink);;Launch(varFileLink)This code will use the Export to Excel Power Automate flow to create a file link and then launch this file link. Allowing the user to open the data in Excel Online.
Final code
The final code in your button should now look like this:
Clear(ExportDataCollection);;ForAll( Gallery.AllItems As colCSV;
Collect(ExportDataCollection;
{'Risk Title': colCSV.'Risk Title';
'Risk Owner Email': colCSV.'Risk Owner'.Email;
'Risk Owner Department': colCSV.'Risk Owner'.Department;
'Risk Status': colCSV.'Risk Status'.Value;
'Risk Due Date': colCSV.'Risk Due Date';
'Project Name': colCSV.'Project Name'.Value;
Created: colCSV.Created;
'Created By': colCSV.'Created By'.Email;
Modified: colCSV.Modified;
'Modified By': colCSV.'Modified By'.Email}));;Set(varFileLink;ExporttoExcel.Run(JSON(ExportDataCollection;JSONFormat.
IncludeBinaryData)).filelink);;Launch(varFileLink)Test the functionality by clicking the button, if all works you should be provided with a link that goes to excel online and that contains all the data currently visible in the gallery on your app.

